Tutorial for native ARM PalmOS applications using PRC-Tools

Writing applications for PalmOS using native ARM code, especially using only free tools is something that seems impossible to most people. Well, with this tutorial I aim to prove them wrong: the aim is create a simple breakout tool using only free tools. It’s primarily aimed at people who have some experience with the programming language C, but have never developed for PalmOS. However if you have some understanding of how a computer works, you should be able to complete it without too many difficulties as well.

Basically, this document is divided into the following parts:

  1. Tools Setup

    1. Cygwin

    2. PRC-Tools

    3. PalmOS SDK

    4. PEAL

    5. PARM Lib

    6. pilrc

The breakout game will be posted lateron 🙂

Tools

Naturally, the first thing you want to do is set up all the tools you’ll need to compile your code into a PalmOS application, While this is a bit of a task, most of it is pretty straightforward, the most difficult part is actually knowing what you are going to need:

Cygwin (and PRC-Tools)

All the tools you are going to use are actually Linux tools, so the first thing you’re going to need is a Linux-like environment. Of course you could install Linux, but of course that’s not for everybody.

Cygwin is basically an environment that translates Linux commands into their Windows counterparts, so that Linux apps can run under Windows. Think of it as a Linux emulator (Before the more experienced users start crying: I know that’s not the way it works, but for our purposes this comparison is sufficient).

Installation is very simple, just download the installer from http://www.cygwin.com/ (“Install or update now! (using setup.exe)”) and run it. Chose the following options:

“Next” ->

“Install from the Internet”, “Next” ->

“Root Directory” (Enter the path where you want to install Cygwin), “Install for All Users”, “Default Text File Type Unix / binary”, “Next” ->

“Local Package Directory” (Enter path where downloaded files should be saved, so you can reuse them when reinstalling Cygwin), “Next” ->

“Direct Connection” or whatever you need to get a connection to the internet, “Next” ->

Enter “http://prc-tools.sourceforge.net” into the “User URL:” field, press “Add”, Locate “http://prc-tools.sourceforge.net” in the list, click to select, locate a different mirror, for example “http://ftp.heanet.ie” is pretty reliable, hold down “CTRL” while selecting it, check if both “http://prc-tools.sourceforge.net” and “http://ftp.heanet.ie” are selected, “Next” ->

Click on the “+” in front of “Devel” and find the packages “GCC”, “Make”, “PRC-Tools” and “PRC-Tools-ARM”. Click on the word “Skip” next to them until it says “install”or the latest version number (Don’t install “pilrc”), “Next” ->

“Installation Complete”

Now the compiler is installed and ready.

PalmOS SDK

Unfortunately, you need a little more than just a compiler to create a working program. You also need some libraries that allow you access to the PalmOS system internals. These libraries are contained in the PalmOS SDK. To get it, you have to register at http://www.developerpavilion.com/. After you have registered, sign in and go to “Palm OS Developer Tools“. Chose “Core Palm OS SDK” and finally download “Palm OS Garnet SDK (68K) R3 PRC tools Generic UNIX”. Don’t worry about it saying “UNIX”, that includes Cygwin as well. Create a new directory inside your Cygwin installation and name it “PalmDev”. Save the file to that directory. (While you’re there, it’s probably a good idea to also get the PalmOS reference, companions and simulator)

Open the Cygwin Bash Shell from your Start Menu and perform the following actions:

cd /PalmDev/

tar -xzf palmos-sdk-5.0r3-1.tar.gz

palmdev-prep

(Of course, if the archive has a different file name, use that instead of “palmos-sdk-5.0r3-1.tar.gz”)

After running palmdev-prep you should get something like this:

Checking SDKs in /PalmDev

sdk-5r3 headers in ‘include’, libraries in ‘lib’

When GCC is given no -palmos options, SDK ‘5r3’ will be used by default

Writing SDK details to configuration files…

…done

OK, so now the SDK is installed and configured as the default option for the PalmOS compiler. Now you could already start writing code for the 68k plattform. But we want to do a little more than that.

PEAL

Problem is that the arm-palmos-gcc compiler, aside from not working well with the SDK, is that it is pretty limited in what C features it supports. Especially global variables are a problem and this is where PEAL comes in. PEAL is a little parser that relocates data so that global variables work. To install it, just download the tar.gz archive from http://www.sealiesoftware.com/peal/ and place it in PalmDev as well. Extract it with

tar -xzf peal-2005_4_14.tar.gz

(Or whatever you named that file).

This will extract peal and create a directory named something like “peal-2005_4_14” to rename it to just “peal” enter

mv peal-2005_4_14 peal

Now, change to that directory with

cd peal

And go to the postlink directory

cd postlink

Now all you’ve got to do is compiling PEAL. Just type in

make

You’ll get a few warnings, but after a few seconds you’ll get back to the shell.

Enter

./peal-postlink

and you get the help message for PEAL.

PARM

Now we have to overcome the final (and most difficult) shortcoming of arm-palmos-gcc: It’s inability to communicate with PalmOS. PARM does some magic to do this… it’s rather complicated and you actually don’t need to understand it, so there’s no point trying to explain it. Installation is very simple, just download http://www.tapper-ware.net/files/PARM.zip and extract it to your PalmDev directory. It will create a PARM directory containing the necessary files and an example. Change to the example directory with

cd /PalmDev/PARM/example/

The sample code is contained in main.c, make68k.sh contains the information to build the application so that the PalmOS simulator can run it, while makepno.sh compiles the real ARM application. Try it. Run

./make68k.sh

and a main68k.prc file should appear in the directory. Drag it onto the simulator and run “MyBreakout”. It will display an empty screen and when you click somewhere it will draw “Hello World” at that point.

Now try to build the native application. Run

./makepno.sh

and it will first output a warning message

In file included from ../../pnotest.c:27:

../../pace_gen.c: In function `StrPrintF’:

../../pace_gen.c:133: warning: dereferencing type-punned pointer will break stri

ct-aliasing rules

Just ignore it, that’s normal. You’ll get it every time you compile something, there’s nothing wrong with that. A mainpno.prc file should appear that’s identical to main68k.prc, but contains fast, native ARM code. Hotsync it and see if it works. If makepno.sh throws any more errors than it probably can’t find some file, because you placed it somewhere other than the default location. In that case you need to edit the make* scripts. You really only need a simple text-editor for that, but it has to support UNIX-style linebreaks… that’s something pretty much any editor besides notepad can do, but my favourite editor is SciTE ( http://scintilla.sourceforge.net/SciTEDownload.html ), because it requires no installation and has pretty good source highlighting for about any programming language I know. Open makepno.sh in the editor of your choice and you’ll see the script’s source. The most common problem is that you installed PEAL somewhere else than /PalmDev/peal . Just look through it and most likely, you’ll spot the culprit within seconds.

Pilrc

Pilrc is a resource editor for PalmOS. You’ll need it to add icons, forms, bitmaps and so on to your PRC file. Just download pilrc-3.2-win32.zip from http://sourceforge.net/project/showfiles.php?group_id=7404 and extract it to your \windows\system32\ directory. That’s it 🙂 I’m not going to give you a sample now, but we’re going to need it when we do the breakout game next time.

See you then 🙂

Hans
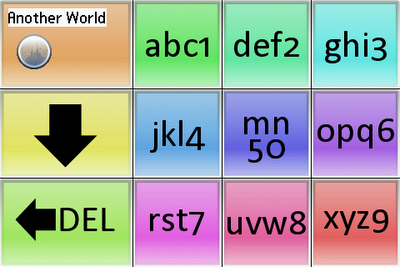
T8Launcher 0.4 with new layout engine and button input

This release features en entirely new layout engine, which will soon allow T8launcher to work on any ARM PalmOS device, even on CliĂ©s with their hybrid Sony Hires/Garnet Hires API. However for now it still only works on the Zodiac as I have yet to modify the screen setup to handle different screens correctly. Also, the portrait skin is still incomplete and the square aspect ratio skin doesn’t even exist.

The most notable improvement in this release is the ability to enter text with the buttons and joystick:

To enter text with the joystick, just press it, move it to the desired position (let’s say top-left for “abc” or center for “mn”) and release it again. While you’re pressing the joystick, the letters that you would enter if you released the joystick will light up.

Another way are the 4 colored buttons on the Zodiac. Just press the button(s) that point in the correct direction. For example Blue and Red (at the same time) for “abc”, Red for “def” and so on. To enter “no” you have to press (at least) two opposite buttons, for example blue and green. Pressing three or four buttons at once has the same affect.

The other functions are also available: Press “Home” for Backspace, “Func” to cycle the list and one of the triggers to launch the selected application.

While the joystick feels more natural for inputting text, the buttons are actually a lot more precise, so I’d recommend using this method for text input.

  • New layout engine with skining
  • Added wrappers for various HiRes APIs (not used yet)
  • Added partially complete 320×480 skin
  • Added button input

You can download it here:

Download:

T8Launcher updated to 0.3

This is mainly a bugfixing release, but it also features a smaller footprint:

  • Fixed a problem where database-handles wouldn’t get released, leading to a drawing problem with EDGE.
  • Fixed the problem with long application names “leaking” into the “abc1” button.
  • Optimized bitmaps for compression, bringing the filesize down to 213kb.

You can download it here:

Download:

T8Launcher updated to 0.2

OK, it seems like the main problem was that the interface wasn’t informative enough, so the changelog is pretty UI-centric:

  • Made text transparent, instead of white background
  • Added label “Launch” to launch button
  • Added label “Next App” to cycle apps button
  • Added label “Backspace” to delete button
  • Added count of remaining matches to cycle apps button (including label “Remaining Matches in List:”)
  • Added input string position to delete button (including label “Number of entered Chars:”)
  • When there’s no match for the current query string, display message and delete last character.
  • Fixed rotation after exiting from Portrait app
  • Don’t display hidden apps anymore

You can download it here:

Download:

T8Launcher for Tapwave Zodiac

I’ve just finished the first Alpha version of T8Launcher for Tapwave Zodiac. This is a pretty minimalistic launcher that uses a T9-like system to let you launch your apps. It’s only an alpha, but from my experience it seems almost 100% stable (in fact, the latest Alpha didn’t crash on me once). There are a few remaining issues that you’ll find listed in the FAQ below, but nothing serious. Still, I’m not responsible for any unintended behavior or any crashes.

Download:

FAQ:

  • How to install T8Launcher? Just Hotsync the PRC file contained in the ZIP file… that’s all
  • How to exit T8Launcher? Enter “Home” to get back to the original Zodiac Launcher
  • How to disable T8Launcher? Unfortunately, that’s not possible (yet). If you want to disable it, you have to uninstall it.
  • How to uninstall T8Launcher? Just use a third-party utility like Filez to delete the T8Launcher database.
  • I see some strange programs like “MMConduit” amd “Error Reporter” in T8Launcher. What are these? These are hidden system utilities. So far T8Launcher ignores the “Hidden” file attribute of PalmOS. Just ignore these.
  • A few programs with very long names leave display artefacts on the “ABC1” button. How can I get rid of these? You can’t, this is a known issue… just ignore it for now.
  • The program list looks pretty unsorted. Am I missing something? The only sorting priority right now is the position of the code match, so for example for “ABC1”, “MN50” Another World comes before Manticore. However, there is no alphabeitcal order.
  • Even after entering the full name of the app another app gets listed first, for example Address XT after entering Address. Just use the “Down-Arrow” button to cycle all results. You’ll get there eventually.
  • Is T8Launcher much slower than the original Zodiac Launcher? Actually, it’s a hell of a lot faster, thanks to the native ARM code and simple structure.
  • How can I launch an application from card? Unless you use a tool like PowerRun, you’ll have to exit T8Launcher and use the standard launcher instead.
  • How can I find out which code I have entered? You can’t. But you can use the “Left-Arrow” button to fix spelling mistakes.
  • How do I enter unlisted characters like space or asterisk? Don’t. T8Launcher ignores anything but a-z, A-Z and 0-9. For example “my App**” would simply become “myapp”.
  • Can I create my own skin for T8Launcher? Well, yes and no. There are no special tools, but you can simply use a normal PRC editor to modify the resources.
  • Why is its name T8Launcher? On normal T9 cellphones, you actually need 10 keys (0-9) to enter a meaningful message. T8Launcher needs 9 buttons for input, so the logical name is T8.
  • How will development continue? I don’t know. I might create a more polished version and try to sell it for $1 but that’s just an idea… Anyway, this Alpha version will always remain free.
  • Why are a few buttons not centered vertically? I made a mistake when creating the images and I haven’t gotten around to fixing it yet.
  • Which tools were used for this? PRC-Tools, PEAL and PARM

Feel free to use the comment section for suggestions and/or bug reports.

Another World for Tapwave Zodiac

I think it’s high time I started posting about something for my beloved Tapwave Zodiac 2 and frankly, I think there has never been a better reason than the release of Another World (a.k.a Out of this World) for the Zodiac by Chrilith.

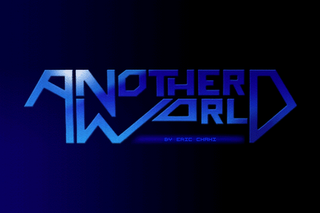
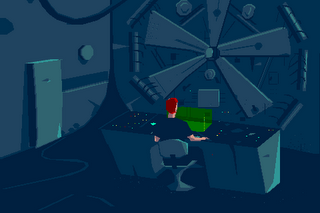
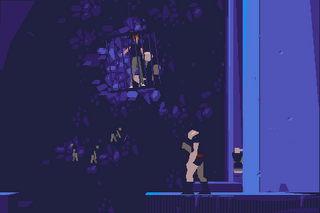
And what a port it is! This is probably the first port of a PC game that truly feels like if it was made for the Zodiac. In fact, this game looks even better than the original PC version, and not only because the screen is a bit smaller, but because it indeed features a higher resolution than the original (of which you can see the intro movie on the left).

But, first things first: Another World is what most people would describe as an Action Adventure game, where you run and jump through large levels, always looking for the next item, while shooting at everything that comes in your way.

The game starts with a long and extremely well done intro sequence that explains how you end up in this bizzare world and this is something that continues throughout the game. Wherever you turn, you are greeted by yet another movie and to tell the truth, that’s what keeps you going. And indeed you’ll need all the motivation you can get to pass all the levels in this game (I have to admit that I never got very far, so if you really want an in-depth review about the WHOLE game, you’ll have to look somewhere else).

But enough about the game itself, most of you have probably played it anyway while in highschool (I still have my original SNES cartridge). I said at the beginning that I think this port is special in that it actually feels like a native Zodiac game:

It starts with the fact that Another World doesn’t display some oddly coloured launcher screen or annoying debug messages. Instead you get a nicely done welcome screen that, which after maybe half a second of loading gives way to the intro sequence. An intro sequence with loud digital thunder, wonderful music and native 480×320 resolution.

That’s right: 480×320, not 320×200 like the PC version. That’s because Another World is one of those few 2D games that use vector graphics instead of the usual raster graphics. And unlike raster graphics, vector graphics stay sharp no matter what resolution you choose. Oh, and not only do they look great, but they are also really fast. There’s never any noticeable slowdown and if I had to guess I’d put the framerate somewhere around 30 fps.

Next are the controls, which are special in that they are really simple. You duck, jump and walk with the analogue stick and you do pretty much everything with the yellow button: run, jump, shoot, activate, build up a shield and so on. I know it sounds crazy to have so many controls on a single button but it really works perfectly. The only button that behaves slightly unusual is the Function button: This button takes you to a menu, where you can enter a four letter code, which will take you to the level specified by the code. The reason for this is that sadly, Another World doesn’t have a savegame function. Instead you are given a code at the beginning of each level. I really hope that later versions will automatically remember any given codes, because this is pretty much the only evidence that you’re not dealing with a native Zodiac game.

Speaking of differences to a native game: The installation is of course slightly different as well. You have to get the files from the PC version and put them (together with a few files from the Zodiac version) on the SD card. Don’t worry, it’s about 1MB and you don’t need any additional libraries like Timidity. Sadly, the legal situation is a bit… well… difficult… to say the least. The PC version is what most people refer to as “AbandonWare”. That means it’s not available for purchase anymore, but the copyright holder is still alive and well. On the internet it’s now common practice to publish these “abandoned” games (just search for abandonia on google), even without the consent of the original author, but it is almost certainly not legal when you’re not a registered library like archive.org. On the other hand, there is no victim with true abandonware, so I’ll leave this up to you (while I’m holding on to my SNES cartridge).