Cross-posted on the RPCS3 forums.
Since RPCS3 got its Move integration I’ve tried getting one game to run perfectly and I thought it would be nice to have all necesarry steps documented necessary to play a Move game with motion controlls on PC.
Note that most Move games are not yet playable on RPCS3 as there is no support for gesture mapping yet and most games require a shake gesture at some point. House of the Dead 3 fortunately doesn’t, which is why we can play it.
![[Image: output.webp]](https://www.tapper-ware.net/files/TutHOTD3/output.webp)
So, let’s start with the Prerequesites
- A Switch-compatible controller (I’m using a 8BitDo SN30 pro+)
- Steam
- RPCS3
- House of the Dead 3
Optionally there are a few components which are not required but improve the experience tremendously
The switch controller is necessary because it can reliably create gyroscope data for Steam which in turn can map it to the mouse, which is what RPCS3 uses as input for Move emulation which it provides for House of the Dead 3 and other move titles.
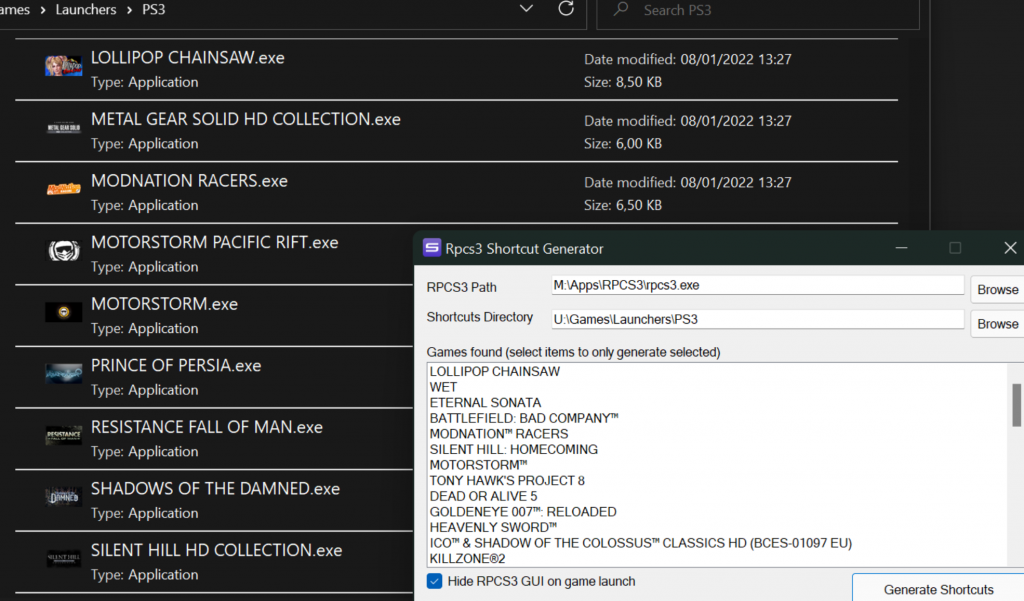
RPCS3 Shortcut maker allows you to add a direct shortcut to Steam for House of the Dead 3 which means you can create a separate input config for it. So it’s not really required, but if you just add RPCS3 directly to Steam you will have to switch controller profiles manually.
Lossless scaling is a nifty little application which allows you to use a windowed application in virtual fullscreen. Since RPCS3 for now hides the cursor in fullscreen you’ll have to switch out of fullscreen whenever there is no onscreen cursor.
There are also some caveats you should know before you invest any more time:
- Steam overlay is unstable in RPCS3
- Cursor WILL drift requiring regular manual recentering
- Image quality suffers when using Lossless scaling because basically we’re scaling down and up again
So now that you know what you’re getting yourself into, here’s the actual howto:
1. Setting up House of the Dead 3 for mouse control in RPCS3
It’s really surprisingly easy. Create a custom config and set Mouse to NULL, Move to Mouse, Camera to Eye, Handler to Fake and Camera to default on the I/O tab.
![[Image: RPCS31.png]](https://www.tapper-ware.net/files/TutHOTD3/RPCS31.png)
If you want to play in fullscreen via Lossless scaling (which is really the only way if you want a cursor which is often required and which will if you don’t do it through LS require you to constantly switch in and out of fullscreen) also make sure to disable RPCS3 fullscreen:
![[Image: RPCS32.png]](https://www.tapper-ware.net/files/TutHOTD3/RPCS32.png)
Disable Start games in Fullscreen mode here if you do.
2. Adding House of the Dead 3 to Steam
In case you didn’t know, you can add any EXE to Steam:
![[Image: AddToSteam1.png]](https://www.tapper-ware.net/files/TutHOTD3/AddToSteam1.png)
Just browse to RPCS3 exe and add it. If you want a separate profile just for HOTD3 use the shortcut maker to create a separate EXE that will launch HOTD directly and add that instead.
3. Setting up the controller in Steam.
Connect your controller via Bluetooth, then enable Switch controller support through Settings/Controller/General Controller Settings/Switch Pro Configuration Support.
![[Image: SteamController1.png]](https://www.tapper-ware.net/files/TutHOTD3/SteamController1.png)
4. Setting up the controller for House of the Dead 3 specifically
You can set up the controller from the Settings/Manage panel but personally I recommend doing it ingame.
Word of warning: Using the Steam overlay breaks input mapping, so you can’t test your changes right away. The solution is frightfully simple: If after going to the Steam overlay the controller appears broken open the overlay again and exit it immediately. It will work then.
Anyway what you will have to do is map gyro to the mouse as well as the triggers to the mouse:
![[Image: SteamController2.png]](https://www.tapper-ware.net/files/TutHOTD3/SteamController2.png)
Now you best set the settings exactly to what you see in the screenshot. It will give to a good starting point.
Take note of Center Cursor and Pause.
Set Center Cursor to “Move mouse cursor”, click in the middle of the screen and set to “Leave at position”. As I mentioned before the cursor WILL drift, so having a way to recenter is absolutely essential.
You also ocassionally need the start button which in RPCS3 is mapped to LMB+MMB. So make sure to enable Multibutton-mappings for the start button and have it press BOTH buttons.
5. Setting up fullscreen (if you want a cursor)
As I said before RPCS3 fullscreen mode robs you of the cursor which makes sense, but not for Move games. So if you want to play in fullscreen, install Lossless Scaling and set it up for quick input.
![[Image: LS1.png]](https://www.tapper-ware.net/files/TutHOTD3/LS1.png)
I’ve also added the shortcut to enable it to the Steam Controller mapping for HOTD3. You may want to do the same.
6. Enjoy
So now if you launch the game from Steam, it will start directly, but in windowed mode.
Hit the button to enable LS and you’ll be in fullscreen.
Get through the calibration using the now visible cursor.
Play the game.
Regularly use your recenter button to get the cursor back to the middle.
Slightly off-topic, but I really want to say a big thanks to the RPCS3 team. It’s wonderful to be able to enjoy these games in new ways. Awesome, keep up the good work!
